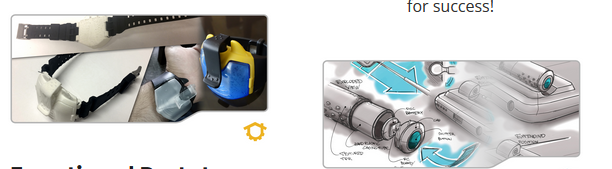
Prototyping is a vital phase of merchandise improvement. It’s the whole process of building a preliminary design, or prototype, of a product or service to check and polish it before you make the final merchandise. Prototyping is definitely an iterative approach that lets you perfect your style and determine problems early on, helping you save pricey errors and generation slow downs down the line. Nevertheless, building a prototype may be costly, time-taking in, and demanding for newbies. In the following paragraphs, we shall assist you through the process of developing a prototype, like the instruments and prototype website assets you want, how to locate a prototyping method, and tips for setting up a successful prototype.
1. Ready your design – Before commencing prototyping, it’s crucial to get a solid understanding of your product’s layout. You may create your merchandise style by making use of 3D modeling computer software, which may match the prototype’s look and find out its functionality. After your design and style is done, you could always send your layout for collaboration and responses to the team employing online resources, helping to make job less complicated.
2. Go with a prototyping strategy – There are various prototyping methods offered, such as speedy prototyping, subtractive prototyping, and ingredient prototyping. Each and every technique has its good and bad points, so you should look at what one best fits your requirements. 3 dimensional publishing is a wonderful option for more compact and intricate items, but it may possibly not be inexpensive for greater physical objects. CNC machining can make a much more large prototype, but it might be relatively pricey. Analyzing each method’s pros and cons will assist you to make a knowledgeable choice.
3. Selecting the most appropriate material – Resources are definitely the essential factors of a prototype, and for that reason, you need to select the right material for your product or service. A large choice of potential supplies are available on the market, such as Ab muscles, PLA, nylon, and versatile filaments, amongst others. Each and every material’s attributes be different, meaning that each product could possibly have exclusive needs. You need to choose the correct substance according to attributes for example longevity, rigidity, and flexibility.
4. Printing the prototype – Once you have all the needed elements of design and supplies, you can start working on stamping the prototype. If you’re taking care of a little item, you can look at making use of three dimensional generating even so, for larger goods, you may want to use available equipment for CNC machining. Regardless that you pick of method, it’s essential to concentrate on the printing process’s specifics. Make sure all facets of the prototype were created in detail, and spend some time to execute good quality investigations in order to avoid any defects or troubles.
5. Improve and Analyze – You should perfect and try out your prototype to distinguish disorders and maximize the style. When you’ve analyzed the prototype, make modifications and refine the design as needed, stamping a new prototype to evaluate once more. The iteration process is very important, and it can continue on up until you are pleased with your prototype.
To put it briefly
Setting up a prototype needs time, hard work, and dedication. It’s an important step in this product advancement procedure, helping you to improve your merchandise well before moving forward to ultimate generation. Remember to take into account your design, choose the best method, select the right material, and test out your prototype to make sure that it is actually doable. As the method may appear frustrating at first, pursuing our manual as being a newbie will allow you to manufacture an excellent prototype.